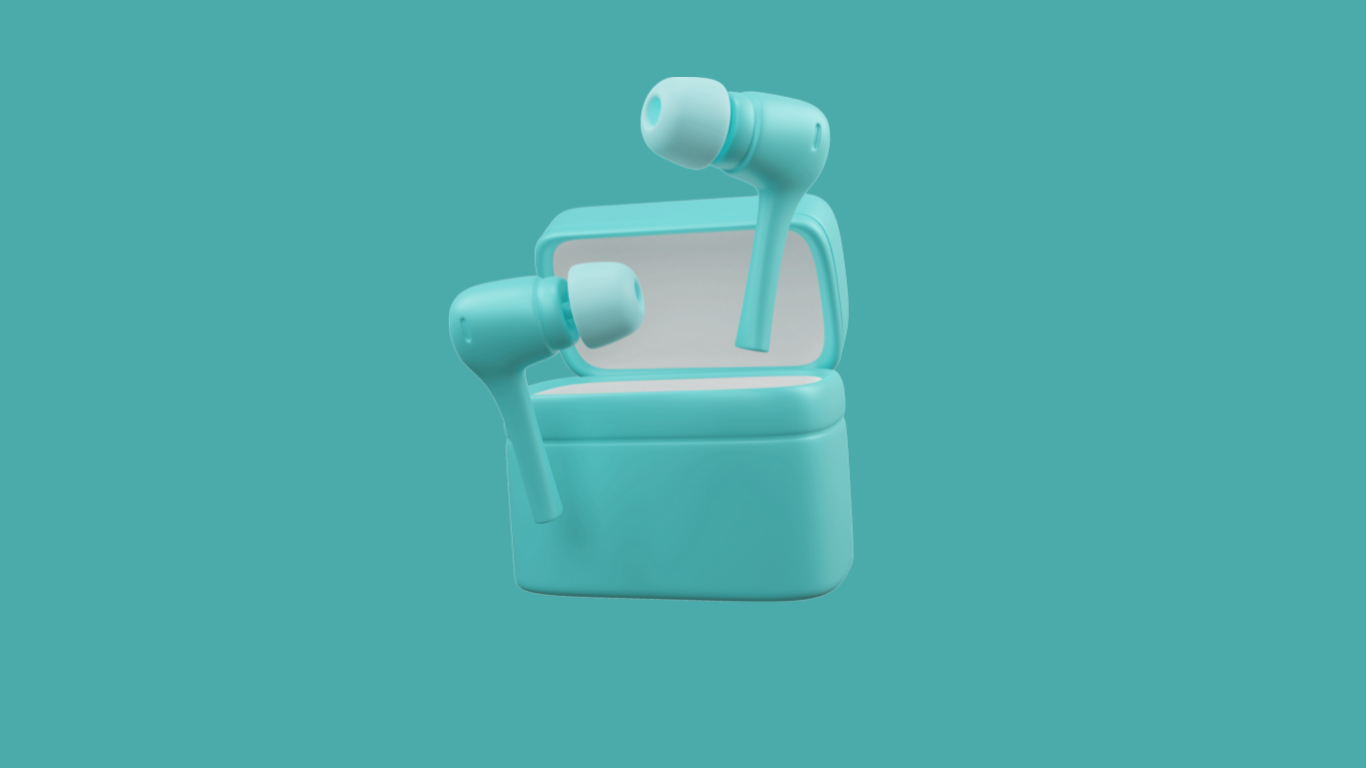
Revive and Reconnect: How to Reset Skullcandy Wireless Headphones
To reset Skullcandy Wireless Headphones, press and hold the power button for 10 seconds. Skullcandy Wireless Headphones can sometimes face connectivity or other issues, which may require a reset.
In this guide, we will explain how to reset your Skullcandy Wireless Headphones in just a few simple steps. It is important to note that the reset process may differ slightly depending on the specific model of Skullcandy headphones you own.
However, most models can be reset by pressing and holding the power button for 10 seconds. By resetting your headphones, you can resolve various issues and enjoy a seamless wireless audio experience.
Common Issues And Solutions
Skullcandy wireless headphones are known for delivering top-notch audio quality and a seamless listening experience. However, like any electronic device, they can encounter some common issues. In this section, we will explore potential problems you may face with your Skullcandy wireless headphones and provide practical solutions to help you resolve them.
Headphones Not Turning On
If you find that your Skullcandy wireless headphones are not turning on, it can be frustrating. Here are a few steps you can take to troubleshoot this issue:
- Ensure that the headphones are charged or have sufficient battery power. Connect them to a power source using the provided USB cable and allow them to charge for at least 30 minutes.
- If the headphones still do not turn on after charging, try performing a reset. Locate the reset button, usually positioned near the charging port or on the side of the headphones. Use a small pin or paperclip to gently press and hold the reset button for about 10-15 seconds. Release the button and then attempt to turn on the headphones.
- If the above steps do not work, it may be necessary to contact Skullcandy customer support for further assistance.
No Sound Coming From the Headphones
Experiencing no sound from your Skullcandy wireless headphones can be disheartening. Here are a few troubleshooting tips to help you regain audio:
- Make sure that the headphones are fully charged and powered on.
- Check if the volume on your device is turned up and not muted.
- Inspect the headphone cable connections for any loose or damaged parts. Ensure that the cable is securely plugged into both the headphones and the audio source.
- If using Bluetooth, ensure that your device is properly paired with the headphones. Go to your device’s settings, locate the Bluetooth menu, and check if the headphones are connected.
- Finally, try connecting the headphones to another audio source to determine if the issue lies with the headphones or the original audio device.
Poor Sound Quality
If you find that the sound quality of your Skullcandy wireless headphones is not up to par, consider these potential solutions:
- Ensure that both the headphones and the audio source are charged. Low battery levels may affect sound quality.
- Check the audio settings on your device and adjust the equalizer to enhance the sound quality to your preference.
- Verify that the headphones are properly placed on your ears. Wearing them incorrectly may affect the sound experience.
- Consider updating the firmware of your headphones. Visit the official Skullcandy website and search for the latest firmware updates for your specific model.
- If the issue persists, it may be helpful to clean the headphone drivers and remove any accumulated debris or earwax using a soft, dry cloth or a small brush.
Bluetooth Connectivity Issues
Skullcandy wireless headphones rely on Bluetooth technology for seamless connectivity. If you encounter any Bluetooth connectivity issues, follow these steps:
- Ensure that Bluetooth is enabled on both your headphones and the device you wish to connect to.
- Check if your headphones are already paired with another device. If so, disconnect them from the previous device and attempt to pair them with the desired device.
- Move your headphones and the device closer together to ensure a stronger Bluetooth signal.
- If possible, try turning off any nearby electronic devices that may interfere with the Bluetooth connection.
- If the issue persists, try resetting the Bluetooth settings on your device. Go to the Bluetooth menu in your device’s settings, locate your Skullcandy headphones, and choose the option to forget or unpair them. Then, retry the pairing process from scratch.
- If all else fails, consult the user manual for your specific headphone model or reach out to Skullcandy support for further assistance.

Credit: www.amazon.com
Step-by-step Guide To Resetting
Resetting your Skullcandy Wireless Headphones can solve various connectivity issues and restore them to their default settings. If you’re experiencing problems with your headphones, follow these simple steps to perform a factory reset.
Step 1: Power off the headphones
To begin the reset process, make sure your Skullcandy Wireless Headphones are powered off. Locate the power button on your headphones and press it until the device turns off. This will ensure a clean reset and allow us to proceed to the next step.
Step 2: Put the headphones into pairing mode
Next, we need to put your Skullcandy Wireless Headphones into pairing mode. This will allow us to access the necessary settings for the factory reset. Follow these instructions:
- Press and hold the power button for about 5 to 7 seconds to turn on the headphones.
- Release the power button and look for the LED indicator light on your headphones.
- The LED light should start blinking, indicating that your headphones are now in pairing mode.
Step 3: Factory reset the headphones
Now that your Skullcandy Wireless Headphones are in pairing mode, we can proceed with the factory reset. Follow these steps:
- Locate the volume up and volume down buttons on your headphones.
- Press and hold both volume buttons simultaneously for about 10 to 15 seconds.
- You might hear a voice prompt or see the LED light flash multiple times, indicating that the reset process has started.
- After a few seconds, the LED light should stop flashing, confirming that the factory reset is complete.
Once the factory reset is done, you can pair your Skullcandy Wireless Headphones with your desired device again. Remember to refer to the user manual or contact Skullcandy support if you encounter any further issues.
Method For Skullcandy Crusher Wireless
If you own a pair of Skullcandy Crusher Wireless headphones and are experiencing issues with them, one effective solution is to reset the headphones. Resetting your headphones can help resolve connectivity problems and restore them to their default state. Here, we will guide you through the step-by-step process of resetting your Skullcandy Crusher Wireless headphones.
Step 1: Power Off The Headphones
The first step in resetting your Skullcandy Crusher Wireless headphones is to ensure they are powered off. To do this, locate the power button on your headphones and press and hold it until the headphones power off. This may take a few seconds, so make sure to keep holding the power button until the headphones turn off.
Step 2: Enter Pairing Mode
Once the headphones are powered off, you will need to put them into pairing mode. Pairing mode allows the headphones to establish a connection with the device you want to use them with. To activate the pairing mode on your Skullcandy Crusher Wireless headphones, locate the pairing button. Press and hold this button until the LED light on the headphones starts flashing rapidly. This indicates that the headphones are now in pairing mode and ready to connect to your device.
Step 3: Perform A Soft Reset
After entering pairing mode, it’s time to perform a soft reset on your Skullcandy Crusher Wireless headphones. To do this, press and hold the volume up and volume down buttons simultaneously for about 5 seconds. Keep holding both buttons until you see the LED light on the headphones flash three times. This indicates that the soft reset has been completed.
Once you have performed these three steps, your Skullcandy Crusher Wireless headphones should be successfully reset. You can now attempt to pair them with your device again and enjoy your music without any interruptions. Resetting your headphones can often help resolve various issues, including connection problems, sound quality, and performance. Give it a try the next time you encounter any difficulties with your Skullcandy Crusher Wireless headphones.
Method For Skullcandy Indy True Wireless
Resetting your Skullcandy Indy True Wireless headphones is a quick and easy process. Simply follow these steps to restore your headphones to their factory settings and resolve any connectivity issues.
If you’re facing any issues with your Skullcandy Indy True Wireless headphones and want to reset them, this post will guide you through the process. Follow the steps below to perform a reset and get your headphones back to their default settings.
Step 1: Power Off The Earbuds
The first step in resetting your Skullcandy Indy True Wireless headphones is to power them off completely. To do this, make sure the earbuds are removed from the charging case, and then press and hold the button on both earbuds until they turn off. This will ensure a complete shutdown of the headphones.
Step 2: Put The Earbuds Into Pairing Mode
Once the earbuds are powered off, you need to put them into pairing mode. To do this, follow these simple steps:
- Press and hold the button on both earbuds for at least 6 seconds. The LED lights on the earbuds will start flashing rapidly, indicating that the earbuds are now in pairing mode.
- Release the buttons and wait for a few moments. The LED lights will continue to flash, indicating that the earbuds are ready to be paired with a new device.
Step 3: Perform A Factory Reset
Now that the earbuds are in pairing mode, you can proceed to perform a factory reset. Follow these steps:
- Press and hold the button on both earbuds simultaneously for 10 seconds. The LED lights will flash red, and then turn off, indicating that the factory reset process has been initiated.
- Release the buttons and wait for a few moments. The LED lights on the earbuds will start flashing white, indicating that the factory reset is complete.
After the factory reset, your Skullcandy Indy True Wireless headphones will be restored to their original settings. You can now pair them with a new device or set them up again with your existing device. Remember to follow the manufacturer’s instructions for pairing and setup.
By following these simple steps, you can easily reset your Skullcandy Indy True Wireless headphones and resolve any issues you may be experiencing. Enjoy your music once again with a fresh start!
Method For Skullcandy Push True Wireless
If you’re a proud owner of Skullcandy Push True Wireless headphones, but have encountered some connectivity issues or simply want to start fresh, resetting the headphones might be the solution for you. By resetting your Skullcandy Push True Wireless headphones, you can restore them to their factory settings and troubleshoot any problems you may be experiencing.
Step 1: Power Off The Earbuds
The first step in resetting your Skullcandy Push True Wireless headphones is to ensure that they are powered off. To do this, follow these simple instructions:
- Remove the earbuds from the charging case, if they are inside.
- Press and hold the buttons on both earbuds simultaneously for about six seconds. You should see the LED lights on the earbuds flash red and then turn off, indicating that they are powered off.
Step 2: Enter Pairing Mode
Once the earbuds are powered off, the next step is to put them into pairing mode. Here’s how you do it:
- Place the earbuds back in the charging case.
- Close the lid of the charging case.
- Open the lid of the charging case and press the button on the back of the case for about three seconds until the LED lights on the front of the case start flashing white. This indicates that the earbuds are now in pairing mode.
Step 3: Reset The Earbuds To Factory Settings
Now that the earbuds are in pairing mode, it’s time to reset them to their factory settings. Follow these steps:
- Make sure the earbuds are still in the charging case and the lid of the case is open.
- Press and hold the button on the back of the case for about ten seconds. The LED lights on the front of the case will begin flashing red and white, indicating that the earbuds are being reset.
- Once the LED lights stop flashing and remain white, the reset process is complete. You can now remove the earbuds from the charging case and pair them with your device again.
By following these simple steps, you can easily reset your Skullcandy Push True Wireless headphones and get them back to their original state. Whether you’re troubleshooting connectivity issues or simply want to start fresh, this method will help you reset your headphones and enjoy a seamless audio experience once again.
Ensuring Proper Charging And Battery Life
Properly charging your Skullcandy wireless headphones is essential to extend their battery life and enhance your listening experience. In this section, we will guide you through the necessary steps to charge your headphones fully and check for any battery-related issues. By following these simple guidelines, you can ensure the longevity of your headphones’ battery and enjoy uninterrupted music on the go.
Charge The Headphones Fully Before Use
Before you start using your Skullcandy wireless headphones, it is crucial to charge them fully. To do this, follow these steps:
- Connect the provided charging cable to the headphones’ charging port. This port is typically located at the bottom or side of the headphones.
- Take the other end of the charging cable and connect it to a power source. It can be a wall adapter, your computer’s USB port, or any other USB charger.
- Ensure that the power source is working correctly and providing a stable power supply.
- Leave the headphones connected to the power source until they are fully charged. The LED indicator on the headphones will notify you once the charging process is complete.
- Once fully charged, disconnect the charging cable from both the headphones and the power source. Your Skullcandy wireless headphones are now ready to use.
Check For Any Battery-related Issues
To maximize the battery life of your Skullcandy wireless headphones, it is important to regularly check for any battery-related issues. Here are some simple steps to help you:
- Ensure that the headphones are turned off when not in use to conserve battery power.
- Check for any physical damage to the charging port or cable. Damaged cables can cause insufficient charging and affect the overall performance of the headphones.
- If you notice any decrease in battery life or unusual charging behavior, try using a different charging cable or power source to identify the problem.
- Keep your headphones away from extreme temperatures, as excessive heat or cold can affect the battery’s performance.
- Regularly update your headphones’ firmware to ensure optimal battery efficiency and performance. Check the manufacturer’s website for any available updates.
By following these steps, you can ensure that your Skullcandy wireless headphones are efficiently charged and maintain a long-lasting battery life. Take good care of your headphones, and they will continue to provide you with an exceptional audio experience.
Updating Firmware And Drivers
Updating the firmware and drivers of your Skullcandy wireless headphones is crucial to enhance their performance and fix any bugs or issues that may arise. In this section, we’ll explore the importance of keeping your firmware up to date and provide a step-by-step guide on how to update it. So, let’s dive in and make sure your Skullcandy headphones are always optimized!
Importance Of Firmware Updates
Firmware updates play a vital role in ensuring that your Skullcandy wireless headphones meet their full potential. These updates provide a range of benefits that can significantly improve your listening experience. Here are a few reasons why you should never overlook firmware updates:
- Bug fixes and stability improvements: Firmware updates address any bugs or glitches that may affect the overall performance of your headphones. By installing these updates, you can enjoy a smoother and more stable audio experience.
- Enhanced features and optimizations: Manufacturers often introduce new features or improve existing ones through firmware updates. These updates unlock additional functionalities, such as improved battery life, better noise cancellation, or enhanced audio quality.
- Compatibility with new devices: As technology advances, so do the devices we use. Firmware updates ensure that your Skullcandy headphones remain compatible with the latest smartphones, tablets, and other gadgets.
How To Update Firmware And Drivers For Skullcandy Headphones
Updating the firmware and drivers for your Skullcandy wireless headphones is a straightforward process. Here’s a step-by-step guide to help you through:
- Step 1: Check for updates
Go to the official Skullcandy website and navigate to the support or downloads section. Look for the specific model of your headphones and check if any firmware updates are available. Make sure to download the latest version. - Step 2: Prepare your headphones
Ensure that your Skullcandy wireless headphones are fully charged or connected to a power source before proceeding with the update. This will prevent any interruption during the firmware installation process. - Step 3: Connect your headphones to a device
Connect your headphones to a device such as your smartphone, tablet, or computer using the appropriate method (Bluetooth or wired connection). - Step 4: Install the firmware update
Open the firmware file you downloaded in Step 1 and follow the on-screen instructions to install the update. In most cases, you’ll need to confirm the installation and wait for the process to complete. Avoid interrupting or disconnecting your headphones during this step. - Step 5: Verify the update
Once the installation is complete, disconnect your headphones from the device and power them off. Then, power them back on and reconnect them to the device to ensure that the firmware update was successful.
By following these simple steps, you can easily update the firmware and drivers for your Skullcandy wireless headphones. Remember, keeping your headphones updated will provide you with an optimized audio experience and unlock all the latest features and improvements.
Cleaning And Maintenance
Proper cleaning and regular maintenance are essential for keeping your Skullcandy wireless headphones in top-notch condition. By following the right techniques and taking preventive measures, you can ensure optimal performance and extend the lifespan of your headphones. In this section, we will guide you through the proper cleaning techniques for your headphones and provide tips on preventing issues through regular maintenance.
Proper Cleaning Techniques For Headphones
Keeping your Skullcandy wireless headphones clean is crucial for maintaining the best audio experience. Here are some steps to follow:
- Remove the ear cushions: Start by gently removing the ear cushions from your headphones. You can usually do this by carefully pulling them away from the ear cups.
- Clean the ear cushions: Once removed, wipe down the ear cushions with a soft, damp cloth. Make sure to remove any dirt or debris that may have accumulated on the surface.
- Clean the ear cups: Next, wipe the ear cups with a slightly damp cloth to remove any dust or grime. Be cautious not to use excessive moisture, as it can damage the headphones.
- Check the mesh screens: Take a close look at the mesh screens on your headphones. If dirt or debris is blocking the sound output, use a clean, dry toothbrush to gently brush away any obstructions.
- Avoid using harsh chemicals or solvents: It’s important to avoid using harsh chemicals or solvents when cleaning your headphones, as they can damage the materials and affect the audio quality. Stick to using a soft cloth and mild cleaning agents if necessary.
- Dry thoroughly: After cleaning, allow all components of your headphones to air dry completely before reassembling.
Preventing Issues Through Regular Maintenance
Regular maintenance can go a long way in preventing issues and ensuring your Skullcandy wireless headphones perform optimally. Here are a few tips to keep in mind:
- Store your headphones properly: When not in use, store your headphones in a clean and dry case or pouch. This protects them from dust and accidental damage.
- Avoid extreme temperatures: Avoid exposing your headphones to extreme heat or cold, as it can affect the battery life and overall performance.
- Handle with care: When handling your headphones, make sure to avoid excessive bending or twisting, as it can damage the internal components.
- Regularly check the cables and connectors: Inspect the cables and connectors for any signs of wear or fraying. If you notice any damage, it’s best to replace them to prevent audio issues.
- Update firmware and software: Check for firmware and software updates for your Skullcandy wireless headphones regularly. Installing updates can help improve performance and fix any known issues.
- Follow manufacturer’s instructions: Always refer to the manufacturer’s instructions for specific guidelines on cleaning and maintenance. Each model may have unique requirements that you should follow to ensure longevity.
Mistakes To Avoid
When it comes to resetting your Skullcandy wireless headphones, there are a few common mistakes that you need to avoid. By being aware of these mistakes, you can ensure a smooth and hassle-free reset process.
Skipping Steps In The Reset Process
One of the biggest mistakes that people make when resetting their Skullcandy wireless headphones is skipping steps in the reset process. It’s crucial to follow each step precisely to successfully reset your headphones. Skipping a step can lead to an incomplete reset and result in issues with your headphones.
To avoid this mistake, carefully read and understand the reset process before you begin. Take your time to ensure that you follow each step accurately, as missing even one step can disrupt the reset process. Being patient and thorough will ensure that your headphones are reset correctly.
Incorrectly Identifying The Model Of Headphones
Another common mistake to avoid is incorrectly identifying the model of your Skullcandy wireless headphones. Different models may have different reset procedures, and if you attempt to reset your headphones using the wrong method, it will not work.
To prevent this mistake, it is essential to accurately identify the model of your headphones. Consult the product manual or the Skullcandy website to find the specific reset instructions for your model. Double-check the model number and compare it with the instructions provided to ensure you are following the correct reset process.
Seeking Professional Support
Discover how to effortlessly reset your Skullcandy wireless headphones with the help of professional support. Ensure uninterrupted audio quality and enjoy a seamless wireless experience with these simple steps. Trust the experts to guide you through the process.
When To Consult Skullcandy Support
While troubleshooting and resetting your Skullcandy wireless headphones can often solve minor issues, there may be times when seeking professional support is necessary. Here are a few situations where it is recommended to reach out to Skullcandy support:
- If you have followed the troubleshooting steps and the headphones are still not functioning properly.
- If you are experiencing hardware or firmware-related problems that cannot be resolved through a basic reset.
- If your headphones are within the warranty period and you want to explore repair or replacement options.
Warranty Information And Support Options
Skullcandy provides warranty coverage for its wireless headphones, giving you peace of mind and protection for your investment. The warranty period may vary depending on the specific model and country, so it is important to check the documentation or website for accurate information. If you encounter any issues with your headphones and they are still under warranty, you can take advantage of the following support options:
| Support Option | Contact Information |
|---|---|
| Online Support | Visit the Skullcandy website and access their support section for troubleshooting guides, FAQs, and live chat assistance. |
| Email Support | Email your queries or concerns to support@skullcandy.com, and a representative will respond to assist you. |
| Phone Support | Contact Skullcandy’s customer service hotline at 1-888-697-5855 during business hours for personalized assistance. |
| In-person Support | If you prefer face-to-face interaction, you can visit a Skullcandy store or an authorized service center for direct assistance. |
Remember to provide all the necessary information regarding your headphones, such as the model number, purchase date, and proof of warranty, to expedite the support process. Skullcandy’s dedicated support team is committed to resolving your issues and ensuring that your listening experience is back on track.
Frequently Asked Questions On How To Reset Skullcandy Wireless Headphones
How Do I Reset My Skullcandy Wireless Headphones?
To reset your Skullcandy wireless headphones, simply turn them off, then press and hold the power button for about 10 seconds until you see the LED light flashing. This will reset the headphones and clear any previous connections.
Why Is It Important To Reset Skullcandy Wireless Headphones?
Resetting your Skullcandy wireless headphones can help resolve any connectivity or pairing issues you might be experiencing. It’s a quick and easy troubleshooting step that can often solve common headphone problems.
Will Resetting Skullcandy Wireless Headphones Delete Saved Settings?
Resetting your Skullcandy wireless headphones will not delete any saved settings or customizations you’ve made. It only clears the current connections and puts the headphones back to their default state. Your settings will remain intact.
Conclusion
To sum up, resetting your Skullcandy wireless headphones is a simple yet effective way to troubleshoot issues and improve their performance. By following the steps outlined in this guide, you can easily reset your headphones and get them back to optimal working conditions.
Remember to refer to your specific model’s instruction manual for accurate instructions. Enjoy your uninterrupted audio experience with your reset Skullcandy wireless headphones!